In this tutorial, I’ll be sharing a quick technique for removing the glows, halos, or other anti-aliasing artifacts from your matte/shadow renders or Render Elements renders. The key here is getting the alpha map to apply to the object before the anti-aliasing effect blends the edges of your object with the background. See the examples below.
These black halos are caused by anti-aliasing and attempting to render at transparent image out of 3dsMax. When the image is smoothed during the render it blends colors together. If our color map is anti-aliased separately from the alpha map, we get color bleeding. In the image above, I’ve replaced the back background
Summary
I detail the following steps below, but for people looking for the quick answer, here it is.
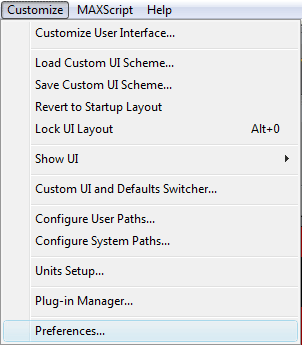
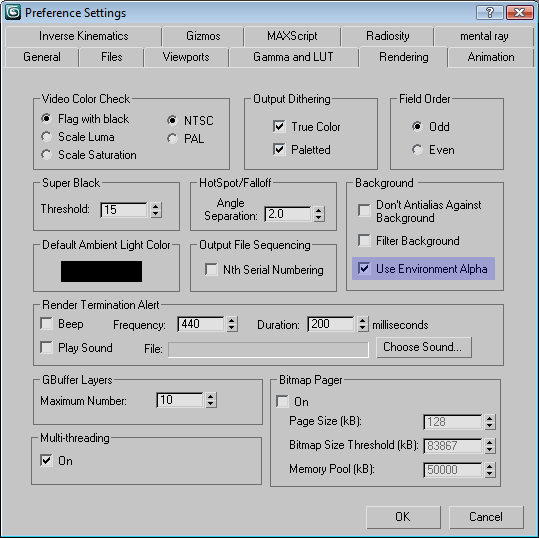
- Under Customize > Preferences… > Rendering tab, select “Use Environment Alpha”.
- Render against a flat, black background – this isn’t optional.
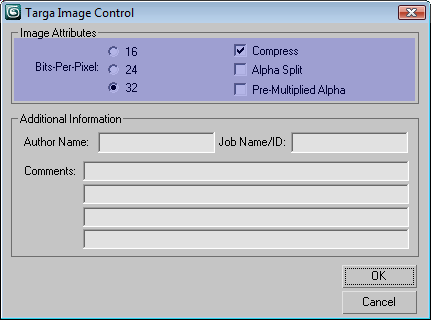
- Save to 32-bit .tga with “Pre-Multiplied Alpha” turned off.
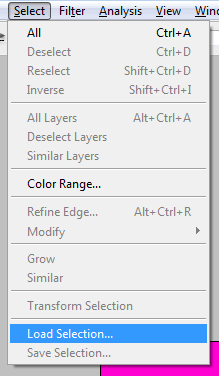
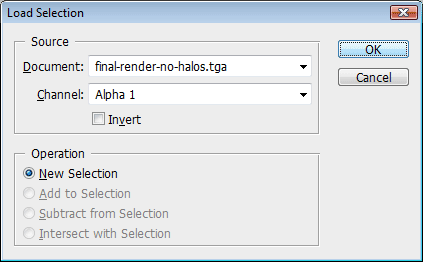
- Load the image in Photoshop and select the alpha channel via Select > “Load Selection…”
- Create a layer mask for the background layer.
Render with a Black Background & Transparency
Now I won’t tell you how to set a black background since it’s the default and, if you’ve changed the background from the default, you know how to change it back.
Save the Render to .tga with Pre-Multiplied Alpha Disengaged
Now you’re ready to open the file in Photoshop. Just open your new .tga file, and re-apply the alpha map that has been saved separately embedded within the image file.
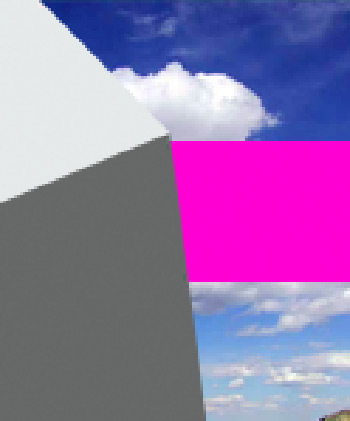
And here’s our final result without any halos. I’ve added an image of clouds to the areas where the background was black. The areas in purple were a purple background that was anti-aliased into the image.
That’s a wrap. Enjoy!


By Alexandre Calil July 8, 2011 - 3:06 pm
Thanks a lot!! Very useful technic!
Is it only working if you save file as tga? Or you can save an open exr or png file for example?
Thanks!!!
By Mr. Bluesummers July 10, 2011 - 2:08 am
I believe it’s only if you save as a TGA. I know it’s weird, but I couldn’t get it to work any other way. Let me know if you find something!
By stenionet August 20, 2011 - 11:04 am
Very good tip. It will be useful to me.
Thanks.
By dave December 27, 2012 - 6:29 am
Thank you mr. bluesummers!