Hello, and welcome to my World-Machine 2 Primer. During this tutorial, you’ll learn about how the World-Machine interface works, how you can manipulate the node-graph, and how you can export the resultant terrain to 3dsMax or Vue d’Esprit. My goal is to get you up and running with the program as quickly as possible, so I’ll be showing you the very core fundamentals so that you can get output from the program. More advanced features and techniques will be discussed in the next few sections of this primer. If you don’t already have World-Machine, consider downloading the trial version so that you can follow along!
The startup screen shows you the node graph; the diagram representation of how your terrain will be built. The left group is the terrain creation group. It contains a single terrain generator. Notice beneath the node, it reads “Advanced Perlin”. This means that this node is generating advanced Perlin noise. Similarly, you’ll notice the other nodes read “Terrace” and “Height Output”. The terrace filter creates a stair-stepped look in the terrain, while the height output node allows you to save the resultant terrain to a file. You don’t have to put your nodes inside these groups; they’re optional. They are included in the startup screen to help you visualize what’s going on in this simple graph.
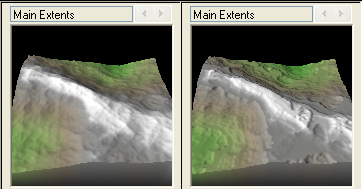
Notice on the top left of your screen, there’s a small terrain preview. This shows you what your terrain looks like at a given part of the node graph. Try selecting the “Advanced Perlin” node, and look at the preview. Then select the “Terrace” node and notice the difference. You should see something similar to the image on the right. When you select a node, World-Machine displays the terrain you would get if you exported from that node in the graph. This is very useful when you’re inserting new nodes into the graph to achieve certain effects.
This also has an impact on rendering or “building” your terrain. Notice the green and yellow round buttons along the top toolbar.
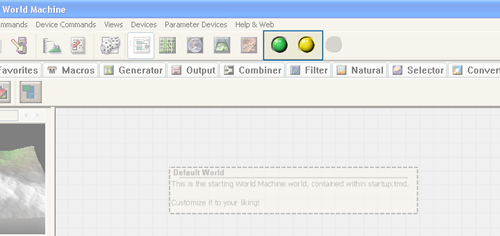
These control the build.
The green button, when clicked, builds all nodes, regardless of whether they’re before or after of the node you’ve selected. The yellow button, however, builds only the nodes up to (and including) the node you currently have selected. For example, if you select the “Advanced Perlin” node and click the yellow button, World-Machine will only render the heightfield generator, and ignore the “Terrace” node. You’ll realize the value of this button when you start working with terrains so complex that they bog down your machine if you try to render the entire solution every time.
Let’s try that now. Click the green button to render the entire hieghtfield. You’ll notice a window appear that displays the build process. This progress window is miles above what it used to be now that it includes a device breakdown. When the build is complete, you can click “OK” to close the dialog. If you find it annoying for smaller builds, you can choose to have it auto-hide in the dialog found in World Commands >> Preferences.
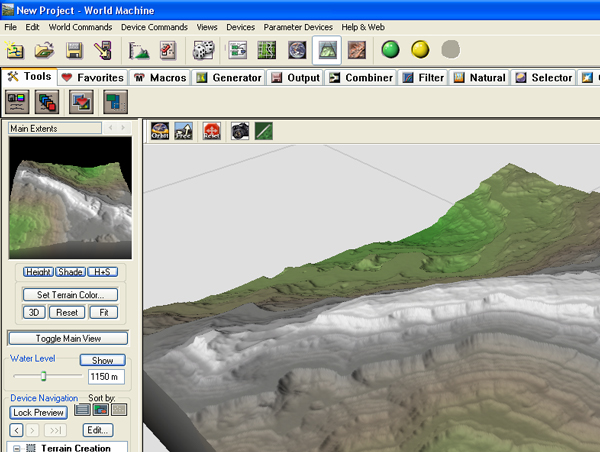
Now that the build is complete, you can preview the landscape in the 3d view!
Notice that instead of the node graph highlighted in the button bar, I now have the 3d view button highlighted. Give it a click, and you’ll see the high resolution version of the terrain. This view is useful for getting a bird’s eye view of your landscape. Note that if you’ve made changes to your terrain after building, and then try to use this view, you’ll only get a super-low resolution preview image.
The 3d view is controlled by the left mouse button (rotate), the right mouse button (zoom), and the Up/Down/Left/Right arrows (move the camera on the X/Z plane). You’ll want to inspect your landscape like this before exporting it to your favorite rendering program.
Alright! We’ve covered the default scene, as well as building and viewing terrains. Now we’ll have a quick look at how you can modify the terrain, and then we’ll export the scene.
First, let’s try editing an existing node. Go back to the node graph by clicking on the graph icon in the button toolbar. Double click on the “Terrace” node to open a dialog that will alter its properties. I encourage you to play around with these settings. For now, I’ll reduce “Terrace Layering” down to 1, which will drastically lower the number of ‘steps’ in the terrain.
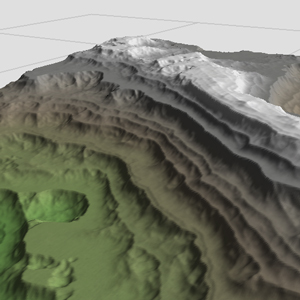
I’ve included an example of what my terrain now looks like on the right. It’s looking pretty good, but it’s still got that fresh terrain feel. We need to weather the landscape procedurally in order to make it appear more natural. In addition, we’ll want a more sweeping vista in order to get a good image after the terrain is rendered.
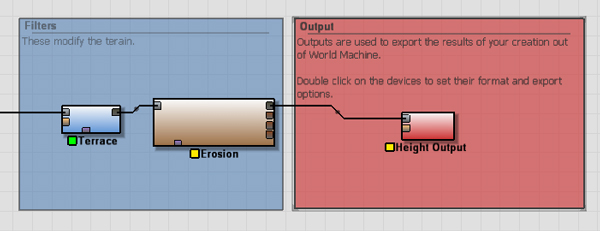
Let’s get to it. Go ahead and click on the “Natural” tab, and click on the very first button on the left called “Erosion”. Click next to the terrace to create a new “Erosion” node. You’ll notice that the color below the new node is red; that is because it is not connected to any other nodes, and will not be included next time you build the terrain. In order for it to have any effect, you’ll need to connect an input to the left side, and an output to the right side of the node.
To do this, just click on the little dark box on the right side of the “Terrace” node and then click on the lighter box on the left of the “Erosion” node. This will link the two together. Now do the same for the output of the Erosion node to the input of the “Height Output” node. It’ll look like the image below when you’re done.
You should also notice a change in the preview on the upper right of the user interface. It looks like it’s undergoing a kind of melting process. That’s the erosion in action. Because the Erosion and Height Output nodes haven’t been built yet (and have a yellow status icon), you’ll want to click the green “Build All” button and have a look at the full-resolution terrain in the 3d view again. You’ll probably notice at this point that the build takes longer this time. That’s because erosion is an intense process and should be used carefully. If you use too many erosion nodes, you’ll start running into trouble!
I’m going to double click on my Erosion node, and, Under the “Presets” group, I’m going to select ‘A Flood of Slurry’. This step is, of course, optional.
The last step in this tutorial is to increase the size of the terrain and get a broader landscape represented. World-Machine is excellent, in part, because it can create vast landscapes that all adhere to the same procedural rules.
The “World Extents and Resolution” button is pretty self explanatory. You use this dialogue to alter the resolution of the terrain and how large the single terrain should be when it’s built. If you are using the trial version of the software, you will be unable to select a terrain size larger than 512×512. However, if you’ve already bought the software, go ahead and use 1024×1024 for this demonstration. Under the “Render Extents” group, change the “Width” and “Height” parameters to read 16.00 km each. This will make World-Machine render a larger area over the same amount of pixels. Note that this reduces the resolution per square meter, so keep in mind how big you want your scene when finished.
One final note. The terrain altitude scaling in the upper right corner of the dialogue allows you to set the overall height of the terrain in the preview and 3d view. If you find your terrain looking vertically stretched or squashed, this is the parameter you’re looking for.
That said, let’s take one more full build using the green button, and this terrain should be ready for export.
In order to export the heightfield, we just have to set the right parameters in the “Height Output” node at the end of the graph. Double click on that last, red node, and pick a file format. Generally speaking, you’ll want to use TIFF unless you’re using Terragen in which case .ter is what you need. The other types are for convenience, and if they fit your situation (i.e. BMP/TGA for dame engines) feel free to select those. Once you’ve picked a format, click the “set” button at the top of the dialogue and select an output directory. This directory will be saved, and you can even elect to have World-Machine automatically save the map every time you build. This is a real timesaver!
And that’s it! You now have the very basics you need to understand, manipulate, and save a terrain in World-Machine. There are tons of features to this program, and you’ll discover them most effectively through playing around with parameters and filters. I’ll be writing more tutorials in the future (and maybe even doing a Monday Movie) discussing techniques in World-Machine and how you can use this handy program to boost your pipeline.




By World-Machine 2 Primer | MrBluesummers.com December 26, 2008 - 5:26 pm
[…] Click here to read the primer! Category: Blog You can follow any responses to this entry through the RSS 2.0 feed. You can leave a response, or trackback from your own site. Leave a Reply » Log in […]
By Hugh June 25, 2010 - 12:02 am
Thank you for taking the time to put together this tutorial. I had read the entire manual but it was obvious that the documentation was written by someone who had a lot of experience with the program and might have forgotten that some of us new folks have a lot of dumb questions. This tutorial was perfect and exactly what I needed after of hours of fiddling with the trial version but unable to connect basic nodes in a meaningful way. This really helped me out. Thanks again for the great tutorial!
Hugh
By Josh July 23, 2010 - 4:34 am
Thank you for putting this together! Nice and clear, complete and a great basics tut to open the mind. Keep em up if ya can!
By Kilic Oyunlari December 8, 2010 - 6:18 am
Hey great post! Thank you However I’m having little problem with your RSS feed. Don’t know why Unable to subscribe to it. Does anyone else facing identical rss issue?
By Mr. Bluesummers February 21, 2012 - 5:02 pm
Images fixed!