In this quick tutorial, we’ll look at how you can create custom 3d Studio Max rollouts for your tools. You can make custom floating or docked windows or toolbars that hold your tools and that make it easy to customize your workspace. These tools are usually called “actions” and can be almost anything you imagine! They can be
- 3dsMax modifiers like bevel, extrude, etc,
- actions like “Convert to Editable Poly…”, or
- tools like align, hide, etc.
It can save you time and that’s part of what getting better at 3d is all about.
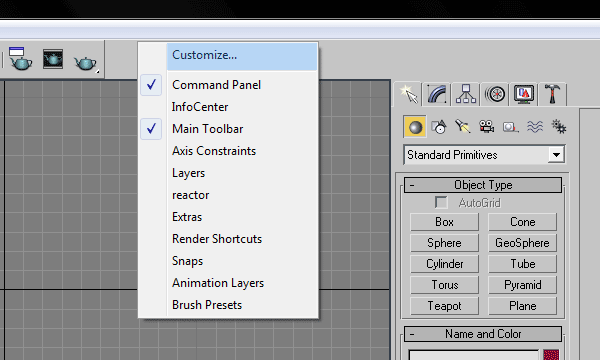
Step 1- Right click on an empty interface area
Right click on an empty interface area to get the interface customization menu. Select “Customize…” Otherwise, you can go to Customize > Customize User Interface… and select the “Toolbars” tab.
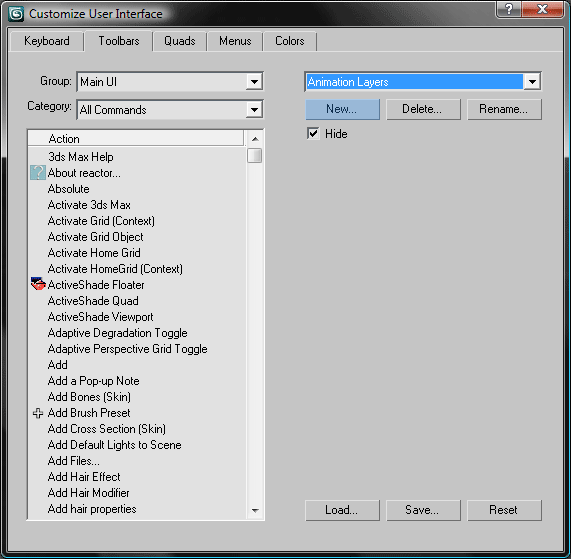
Step 2- Create a new rollout
What you need to do is create a new rollout by clicking the “New…” button.
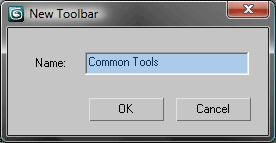
Go ahead and give your new rollout a name. I’m calling mine “Common Tools”.
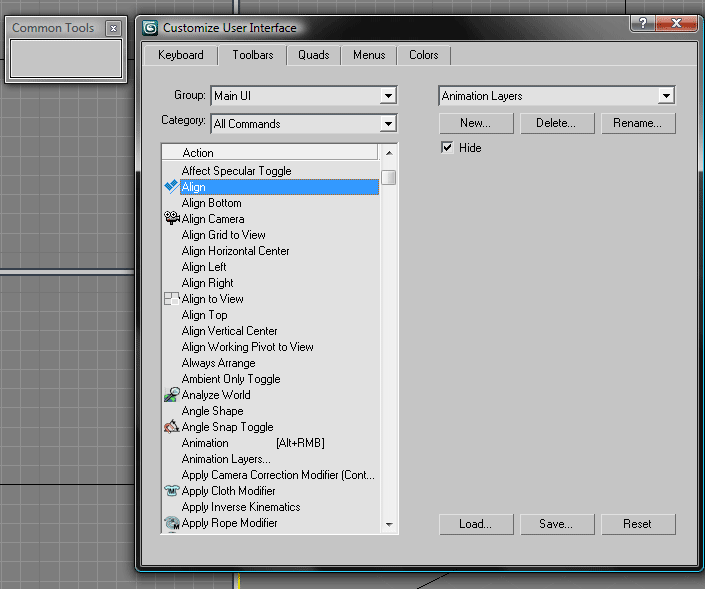
Step 3- Assign some actions to the new toolbar
Click and drag some actions into the new toolbar. The vast majority of what you can do in 3d Studio Max can be assigned to buttons in toolbars. Interestingly, all of these actions are also scriptable via MaxScript.
You now have a new custom toolbar. You can access it using the right-click menu we used to start this process. Right-click on an empty area of the UI and select your new “Custom Tools” toolbar.
BONUS: Assign custom actions to your toolbar using MaxScript
You can assign custom actions to your toolbar with the MaxScript Macro Recorder Window. Press F11 or open the listener through MaxScript > MaxScript Listener…
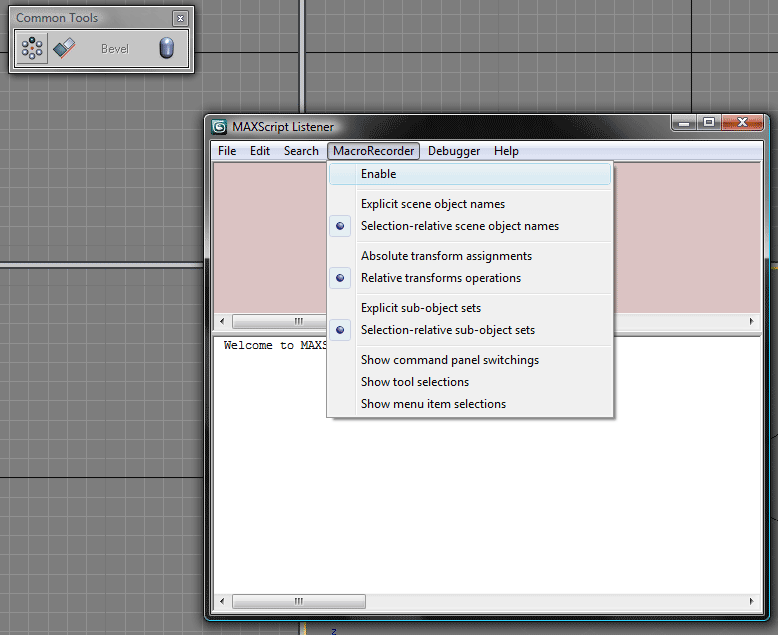
Enable the MacroRecorder as shown. This will record everything you do in 3d Studio Max in the pink window, and allow you to record a pre-defined set of actions. This could be everything from making flower petals to building a skyscraper.
When you have your action recorded, select all of the text in the pink window and drag it over to your toolbar. If you have extra actions recorded, you may have to remove those. Remember that everything you click or do is being recorded, so make sure you did what you want to record and nothing else.
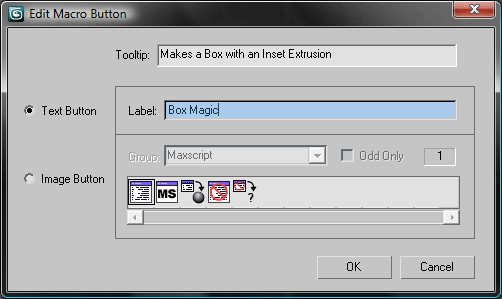
You can right-click on the button that was created and select “Edit Button Appearance…” to change the image or text of your new button.

By Mehdi Shay October 12, 2010 - 11:54 am
you saving people’s life and time 🙂 thanks man , A loooooooooooooooooooooot .
By Mr. Bluesummers November 5, 2010 - 3:50 am
Much love, Mehdi! Glad you liked the tutorial. Hoping to get another materials guide hammered out, and then I’m getting started on a dominance war resources thread. 😀
By Kareeem February 24, 2012 - 8:48 am
thx for this!
By VatelsRevenge November 17, 2012 - 10:27 pm
This is a very handy thing to know. But it’s misleading. I was looking for a way to create custom “Rollouts”. You’re showing people how to make custom “Toolbars”. The difference is that a Rollout in 3DS Max is a menu item you click on that rolls out a bunch of tools, but also checkboxes, toggles, and the such. Such as when you click on the Create tab with “Geometry” and “Standard Primitives” selected, you have 2 Rollouts:
“Object Type” and “Name and Color”
I’m creating some tools that will help the people at my company create scenes fit for a specific purpose. I’ve already started creating the custom window that would contain all the tools, checkboxes, etc. But having rollouts is absolutely essential. With all the options that’ll be contained, I need a way to allow the user to hide some of the options. Just like how the Modify Tab allows you to shrink different rollouts that contain options you’re not currently working with.
By koko January 11, 2013 - 3:42 pm
Would I be able to assign a hot key to it ?